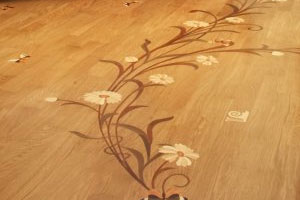
How to Lay Parkay Flooring
If you have decided to have parkay flooring in any room of your house, you have made a wise decision. If the floor is laid properly and you maintain it well, it can actually increase the value of your home. Furthermore, parkay flooring is incredibly beautiful, warm and welcoming, as well as being very long lasting. Of course, there are some downsides to parkay flooring, including:
- It is expensive
- Repairs are difficult
- It scratches easily
But overall, the benefits outweigh these by far. If you are wondering how to lay parkay flooring, this short guide may help you somewhat, although the best advice would always be to have the flooring laid by a professional.
Preparation of the Floor
The first thing you need to know about how to lay parkay flooring is the preparation, which overall takes the longest. You will need to remove all furniture in the room that you are flooring, as well as take the doors of their hinges. Then you will, of course, have to lift the existing floor. It is likely that you will find some residue of the previous flooring, which you will need to remove as the underfloor for parkay floors needs to be perfectly level. If you find that the floor is very warped, you will need to use plywood or other materials to level the floor.
Preparation and Laying of the Parkay
Once your floor is completely clean and level, you will be ready to start preparing your parkay floor. The best advice on how to lay parkay flooring is to have a few test runs, by laying the wood blocks in different shapes and patterns to see how it will look best. Use chalk to indicate on the floor where each block will go, taking care to leave some space around the edges, where cork runners will be installed.
Once you are completely happy with where each piece will go, it is time to use the adhesive. However, you must carefully read the instructions, as adhesives regularly contain harmful chemicals. You can use a rubber mallet to tap each block of wood into place. The adhesive generally takes 24 hours to set, meaning you should always work your way towards the doorway, allowing you to get out of the room without stepping on any blocks that are in the process of setting.
Aftercare
Once you know how to lay parkay flooring, have gone through all the steps and have let the adhesive set, your floor will need its finishing touches. Some floors need oil, others need wax and others need lacquer or veneer. Check with your manufacturer which type of finish needs to be used on your floor, as using the wrong finish can severely damage the parkay. Often, parkay flooring will also need buffering, which can generally not be done by a simple handheld buffer and requires heavier machinery.
These are but some of the things to think of when you are wondering how to lay parkay flooring. The fact is that parkay flooring is expensive, so you may as well opt to hire a professional for peace of mind.

